Minolta X-700 Camera Manual⁚ A Comprehensive Guide
Welcome to a detailed guide on the Minolta X-700, a beloved 35mm SLR camera. This comprehensive resource will help both new and experienced users understand its features. You can discover how to load film, choose the correct exposure, and use various accessories.
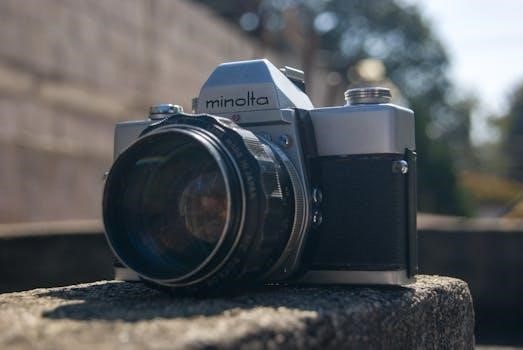
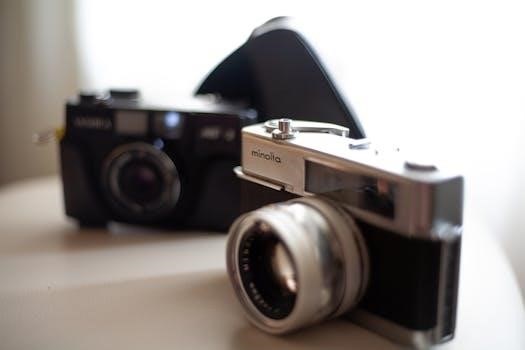
The Minolta X-700, introduced in 1981, stands as a landmark 35mm SLR film camera. It’s celebrated as one of the finest manual focus SLRs ever produced. This camera boasts a blend of innovative technology and user-friendly design, making it a favorite among photography enthusiasts and professionals alike.
Its fully mechanical shutter offers speeds ranging from 1 second to 1/1000th of a second. The inclusion of an aperture priority auto-exposure mode provides flexibility in various shooting scenarios. The X-700 allows photographers to control depth of field while the camera handles shutter speed.
The camera gained immense popularity due to its reliability and availability of parts. The X-700 is a solid choice for those new to film photography. It also appeals to seasoned users who appreciate its robust build and intuitive operation. With its blend of manual control and automated features, the Minolta X-700 offers a rewarding photographic experience. It is a versatile tool for capturing stunning images. The camera’s enduring legacy is a testament to its quality and design.
Key Features of the Minolta X-700
The Minolta X-700 is equipped with several notable features that contribute to its appeal. These include its aperture priority mode. This allows photographers to set the aperture while the camera automatically selects the appropriate shutter speed. This is ideal for controlling depth of field.
It also features a fully mechanical shutter with speeds ranging from 1 second to 1/1000th of a second. This provides a wide range of creative options. The X-700’s metering system ensures accurate exposure in various lighting conditions. This contributes to well-balanced images. The camera uses Minolta’s MD lens mount, offering compatibility with a wide range of high-quality lenses.
The X-700 includes a bright viewfinder for easy composition and focusing. It also offers TTL (Through-The-Lens) flash metering, allowing for precise flash exposure control. The camera’s ergonomic design ensures comfortable handling. Its intuitive controls make it accessible to both beginners and experienced users. The Minolta X-700’s combination of features and ease of use solidify its place as a classic SLR camera.
Loading and Advancing Film
To begin, open the camera back by gently pulling up on the rewind knob. This will release the latch and allow the back to swing open. Insert a fresh roll of 35mm film into the film chamber, ensuring the film canister is securely seated. Pull the film leader across the camera body and insert it into one of the slots on the take-up spool.
Advance the film using the film advance lever, typically located on the top right of the camera. As you advance the film, make sure the film leader catches on the take-up spool and begins to wind smoothly. Continue advancing the film until the frame counter displays “1”. Close the camera back, ensuring it clicks shut securely.
After closing the back, advance the film two or three more times to move past the exposed film leader. Now the camera is ready to start taking pictures. After each shot, use the film advance lever to advance the film to the next frame. After you’ve completed your roll of film, rewind the film back into the canister using the rewind knob before opening the camera back.
Exposure Control⁚ Aperture Priority Mode
Aperture Priority mode, often denoted as “A” on the Minolta X-700, is a semi-automatic exposure mode that grants the photographer control over the aperture setting, while the camera automatically selects the appropriate shutter speed to achieve proper exposure. This mode is particularly useful for controlling depth of field, which refers to the area of the image that appears acceptably sharp.
To use Aperture Priority mode, first, set the mode dial to “A.” Then, rotate the aperture ring on the lens to select your desired aperture value, commonly expressed as an f-number (e;g., f/2.8, f/8, f/16). A wider aperture (smaller f-number) results in a shallower depth of field, ideal for isolating subjects from the background. A narrower aperture (larger f-number) yields a greater depth of field, suitable for landscapes or group photos where you want everything in focus.
The camera’s internal metering system will then measure the light coming through the lens and automatically select a shutter speed to match the chosen aperture, ensuring a correctly exposed image. Before taking the shot, look through the viewfinder to see the shutter speed that the camera has selected. Half-press the shutter button to activate the meter, and the shutter speed will appear in the viewfinder display. If the selected shutter speed is too slow, consider adjusting the aperture or ISO.
Manual Mode Operation
Manual mode on the Minolta X-700 provides the photographer with complete control over both aperture and shutter speed, allowing for precise adjustments to achieve the desired exposure and creative effects. To engage Manual mode, set the mode dial on the camera body to the “Manual” or “M” setting. This disengages the camera’s automatic exposure system, placing all settings directly in your hands.
In Manual mode, you must independently set both the aperture and shutter speed based on your understanding of the scene’s lighting conditions and your desired outcome. The aperture is adjusted by rotating the aperture ring on the lens, selecting the f-number that controls the depth of field. The shutter speed is set using the shutter speed dial on the camera body, determining the duration the shutter remains open, affecting motion blur and overall exposure.
The X-700’s built-in light meter assists in Manual mode by providing a reading in the viewfinder. Typically, a needle or LED display indicates whether the current settings will result in an overexposed, underexposed, or properly exposed image. Adjust the aperture and shutter speed until the meter indicates a balanced exposure. Remember, Manual mode requires practice and a solid understanding of the exposure triangle, but it unlocks the full potential of the X-700.
Metering System Overview
The Minolta X-700 employs a sophisticated through-the-lens (TTL) metering system, designed to accurately measure the light entering the camera and assist in achieving proper exposure. This system evaluates the light after it passes through the lens, accounting for the effects of any filters or lens characteristics, providing a more precise reading than external light meters. The X-700 uses a center-weighted metering pattern, meaning it gives more importance to the light levels in the center of the frame while still considering the light from the surrounding areas.
When using Aperture Priority (A) mode, the metering system automatically selects the appropriate shutter speed based on the aperture you’ve chosen and the light it reads. In Program (P) mode, the camera selects both the aperture and shutter speed automatically based on the scene’s brightness. In Manual (M) mode, the light meter serves as a guide, displaying an indicator in the viewfinder to show if the current settings are likely to overexpose, underexpose, or correctly expose the image.
To activate the metering system, gently press the shutter release button halfway; The viewfinder will then display the meter reading, allowing you to adjust your settings accordingly. Understanding how the X-700’s metering system works is crucial for achieving well-exposed photographs, especially in challenging lighting conditions.
Using Flash with the X-700
The Minolta X-700 offers excellent flash compatibility, enhancing its versatility in various shooting scenarios, especially those with low or challenging lighting. The camera features a hot shoe for direct attachment of Minolta flashes, such as the dedicated Minolta Auto Electroflash models, which seamlessly integrate with the camera’s metering system. When a compatible flash is connected, the X-700 can automatically set the appropriate shutter speed for flash photography, typically 1/60th of a second, ensuring proper synchronization.
In automatic flash mode, the camera’s TTL (Through-The-Lens) metering system measures the light reflected off the film during the exposure and adjusts the flash output accordingly. This TTL flash metering ensures accurate and consistent flash exposures, even with varying distances and reflective surfaces. The viewfinder provides feedback on the flash readiness and exposure confirmation, indicating when the flash is charged and if the exposure was successful.
For manual flash control, the X-700 allows you to set the flash output and aperture manually, providing greater creative control over the lighting. This mode is particularly useful for advanced users who prefer to fine-tune their flash settings for specific effects or when using non-dedicated flash units. Understanding the X-700’s flash capabilities allows you to capture well-lit and balanced images in diverse shooting conditions.
Focusing Techniques
The Minolta X-700, being a manual focus camera, relies on the photographer’s skill to achieve sharp images. Mastering focusing techniques is crucial for maximizing the camera’s potential. The X-700’s viewfinder typically features a split-image rangefinder surrounded by a microprism collar. These tools assist in precise focusing.
To focus, look through the viewfinder and rotate the focusing ring on the lens. The split-image rangefinder shows a vertically split image that aligns when the subject is in focus. The microprism collar, surrounding the split-image, makes the image appear to shimmer when out of focus, snapping into sharpness when correctly focused.
Start by roughly focusing on your subject. Then, fine-tune the focus using either the split-image or microprism collar. Practice using both to see which you prefer or which works better in different situations. For subjects with fine details, the split-image is often more accurate. In low light, the microprism collar might be easier to use.
Another useful technique is “focus and recompose.” Focus on your subject, then gently half-press the shutter button to lock the focus. Recompose your shot while maintaining the half-press, and then fully press the shutter to take the picture. This allows you to place your subject off-center while keeping it sharp. With practice, manual focusing becomes second nature, allowing for creative control over depth of field and image sharpness.
Available Lenses and Accessories
The Minolta X-700, utilizing the Minolta MD lens mount, boasts compatibility with a wide array of excellent lenses, offering creative versatility for photographers. The MD mount provides access to various focal lengths, from wide-angle lenses ideal for landscapes to telephoto lenses suited for wildlife or sports photography. Prime lenses, known for their sharpness and speed, are also readily available.
Common lens choices include the standard 50mm f/1.7 or f/1.4, versatile options for everyday photography. The 28mm lens is excellent for landscapes and environmental portraits, while the 135mm offers a tighter field of view for portraits and distant subjects. Zooms like the 35-70mm or 70-210mm provide flexibility without changing lenses.
Beyond lenses, the X-700 also supports numerous accessories. External flashes, such as the Minolta Auto Electroflash series, enhance low-light capabilities. Motor drives enable continuous shooting, ideal for action sequences. Dedicated lens hoods prevent flare and improve contrast. Filters, like UV, polarizing, or color filters, add creative effects or protect the lens.
A sturdy camera bag is essential for protecting your X-700 and accessories. A cable release minimizes camera shake during long exposures. Consider a remote shutter release for even greater control. Exploring available lenses and accessories expands the X-700’s capabilities, allowing photographers to tailor the camera to their specific needs and creative vision.
Troubleshooting Common Issues
Like any classic camera, the Minolta X-700 can sometimes present challenges; A common issue is a dead or weak meter, often caused by depleted batteries. Ensure fresh batteries are installed correctly. If the meter remains unresponsive, the internal circuitry may require professional servicing. Another frequent problem is film advance failure. Check that the film is loaded correctly and that the rewind knob turns when advancing.
Shutter malfunctions can also occur, resulting in over or underexposed images. If the shutter speeds seem erratic, the camera might need calibration. Lens issues, such as a sticky aperture or focusing ring, can hinder performance. Clean the lens elements carefully and ensure the aperture blades move freely. Light leaks can appear as streaks or fogging on your negatives. Inspect the light seals around the film door and replace them if necessary.
If the camera locks up, try gently depressing the shutter button and advancing the film. Sometimes, a simple reset can resolve the issue. Always consult the user manual for specific troubleshooting steps. If problems persist, seek assistance from a qualified camera technician. Regular maintenance and careful handling can prevent many common issues and prolong the life of your Minolta X-700. Remember, a well-maintained camera delivers the best results.
Maintenance and Care
Proper maintenance is crucial for extending the life of your Minolta X-700. Always store the camera in a cool, dry place, away from direct sunlight and humidity. Remove the batteries when storing the camera for extended periods to prevent corrosion. Regularly clean the lens elements with a soft, lint-free cloth and appropriate lens cleaning solution. Avoid using excessive pressure to prevent scratches.
Check the light seals around the film door periodically and replace them if they become brittle or sticky. Dust and debris can affect image quality, so gently clean the mirror and focusing screen with a blower brush. Do not touch these surfaces with your fingers. Inspect the battery compartment for corrosion and clean it with a cotton swab dipped in white vinegar if necessary.
Have the camera professionally serviced every few years to ensure proper functioning of the shutter, meter, and other internal components. When changing lenses, avoid doing so in dusty environments. Always use lens caps to protect the lens from scratches and damage. Handle the camera with care and avoid dropping it. By following these simple maintenance tips, you can keep your Minolta X-700 in excellent condition and enjoy years of reliable use. Regular care preserves its value and performance.
Downloading the Official Manual (PDF)
Accessing the official Minolta X-700 manual in PDF format is highly recommended for a complete understanding of the camera’s functions and features. The PDF manual provides detailed instructions on everything from basic operation to advanced techniques. Several online resources offer the manual for download, often free of charge. Before downloading, ensure the source is reputable to avoid corrupted or incomplete files.
The official manual typically includes comprehensive diagrams, troubleshooting tips, and detailed explanations of each mode and setting. It covers topics such as film loading, exposure settings, focusing techniques, and flash usage. Having a digital copy allows you to easily search for specific information and access it on various devices, such as smartphones, tablets, and computers.
Many websites dedicated to vintage cameras and photography enthusiasts host these manuals. A quick online search using terms like “Minolta X-700 manual PDF” will yield numerous results. After downloading, save the file in a secure location for future reference. This resource is invaluable for both new users and experienced photographers looking to maximize the potential of their Minolta X-700 camera. By consulting the official manual, you ensure you’re using the camera correctly and safely.